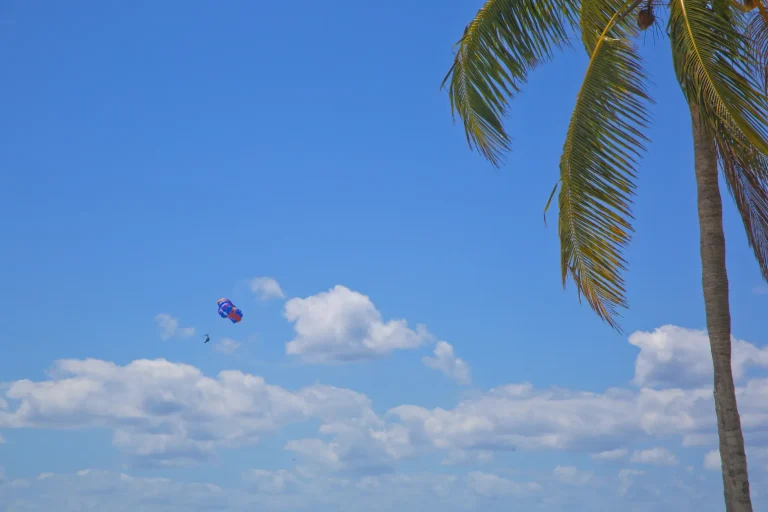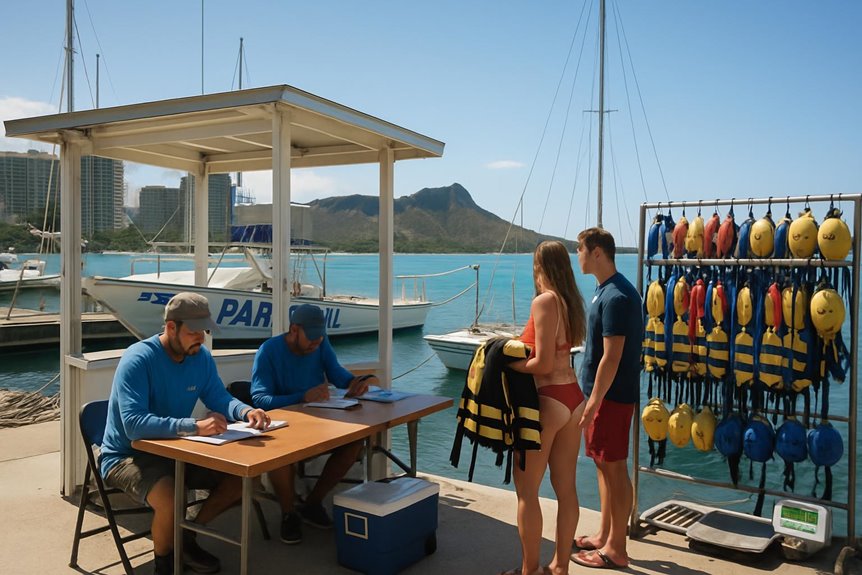
You’ll check in at Kewalo Basin Harbor, and it pays to show up 20 to 45 minutes early because the dock can bottleneck fast. Bring a photo ID and your booking QR, sign the digital waiver, and slip on the color wristband they hand you. Staff will do a quick scale check to pair tandems, then you’ll settle any balance and get fitted for a harness. If you booked through Viator, pull up the verified ticket for timing tweaks, free cancellation, and reserve now pay later. Next comes the part most people don’t expect.
Key Takeaways
- Check in at Kewalo Basin Harbor street-level offices by the boat ramps, using the operator banner and boat name to find the right desk.
- Arrive 30–45 minutes early (at least 20) since check-in can take 15–30 minutes and weekends often run slower.
- Bring photo ID and booking confirmation (QR code for Viator), then complete digital waivers, medical disclosures, and receive a color-coded wristband.
- Expect a quick dock weigh-in for safety; tandem pairings may be rearranged by weight and wind, and over-limit guests can be rebooked.
- After harness fitting and a five-minute safety briefing, you’ll store loose items, pay any balances or locker fees, and board when your group is called.
Where to Check In for Waikiki Parasailing
If you don’t want to start your parasailing day with a sprint down Kalakaua Avenue, lock in your check-in spot the night before.
Most Waikiki operators meet at Kewalo Basin Harbor, at the offices at street level by the boat ramps near Ward Village and Ala Moana Beach Park, two local landmarks.
Look for the company banner and boat name, then line up with your ID and reservation code.
You’ll also find bathrooms at the harbor if you need a quick stop before boarding.
Ask about parking options: the harbor lot charges by the hour, and Ward Village garages can be cheaper with validation.
Bring cash or a card for tips and photo add-ons, skip bulky beach bags.
If you want fewer logistics, Viator tours list dock directions, verified reviews, hotel pickup, free cancellation, and reserve now pay later.
When to Arrive (and How Long Check-In Takes)
Most docks at Kewalo Basin run on a tight schedule, so plan to arrive 30 to 45 minutes before your listed departure time, especially on sunny weekends when the line gets sticky. That Arrival timing gives you buffer for parking, waivers, and a quick safety chat, without watching your boat pull out. Expect Check in duration of about 15 to 25 minutes if you’re early, closer to 30 if a previous trip returns late. Kewalo Basin departures are timed around parasailing boat rotations, so late check-ins can mean getting bumped to the next available slot.
> Arrive 30–45 minutes early at Kewalo Basin, weekends get sticky. Check-in takes 15–25 minutes, closer to 30 if delayed.
- Find the operator table, then confirm your name and time.
- Sign digital waivers and listen for your group number.
- Pay any balance and parking fees, usually $2 to $3 per hour.
- Get weighed and matched to your towline slot.
- Wait near the gate and board when staff calls.
You’ll thank yourself.
What to Bring vs. Leave on Shore
Because you’ll spend a good chunk of the trip sitting in salty spray with nowhere secure to stash stuff, pack like you’re heading out for a quick beach run, not a full day out.
Bring beach essentials: reef-safe sunscreen for quick sunscreen application before boarding, sunglasses with a strap, and a light towel or rash guard.
Add a small water bottle if the crew allows, and keep cash for tips or a last-minute $5 snack at the harbor kiosk.
Leave phones, wallets, and cameras on shore. Most boats follow a valuables policy and you’ll rarely get secure storage beyond a bin.
Even if you can bring it, waterproof phone pouch protection is a must because salt spray and drops are common.
If you book a Viator tour, pick one with verified reviews and free cancellation, then stash extras at your hotel and ride light.
Check-In Desk: ID, Waivers, and Wristbands
Once you hit the harbor, the check-in desk sets the pace for everything that follows, so show up 30 to 45 minutes early and keep your photo ID and booking confirmation in an easy-to-reach pocket.
Arrive 30–45 minutes early, check-in sets the tempo. Keep your photo ID and booking confirmation easy to grab.
You’ll sign a waiver, answer quick medical disclosures, and get a color wristband that matches your boat time. Lines swell when two trips overlap, so grab shade, sip water, and have your phone ready for signature screens. The waiver generally means you’re acknowledging the inherent risks and agreeing not to hold the operator liable for certain incidents, so take a minute to read the parasailing waiver before you tap to sign. Don’t bring passport photos unless staff asks; they don’t help, and salt air curls paper fast. If you used Viator, save the ticket screenshot.
- Photo ID, not a photocopy
- Cash or card for tips and locker fees (about $5)
- Any meds like inhalers
- A dry bag for keys
- Wristband on, jewelry off
How They Verify Your Waikiki Parasailing Booking
If you booked ahead, staff will verify your Waikiki parasailing spot in under a minute, but only if you pull up the right proof fast. Aim to arrive 20 minutes early, especially at the 8 a.m. rush, and open your confirmation emails before you hit the dock. You’ll show your name, date, and party size, then they’ll match it to the manifest and note any add-ons you pre-paid. No extra cost here, just smooth booking verification. If you chose a package with hotel pickup, have that detail ready too so they can confirm it matches your reservation.
| What you show | What staff checks |
|---|---|
| Screenshot of confirmation | Date and time slot |
| Booking number | Manifest match |
| Photo ID | Name spelling |
| Card used to pay | Last four digits |
If you booked through Viator tours, pull the voucher with the QR code. Bring a phone, skip hunting for Wi-Fi, and save screenshots offline.
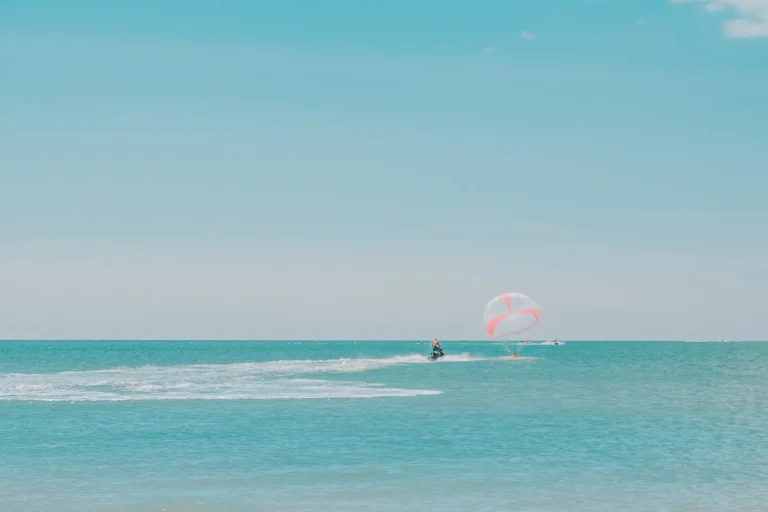
Weigh-In Rules and How Flight Pairings Work
Before you head to the dock, you’ll step on a quick scale check so the crew can confirm weight limits and keep the takeoff smooth, even when the line’s moving fast.
Waikiki crews follow minimum and maximum weight limits for parasailing, so the weigh-in helps confirm you’re within the safe range before you go up.
If you’re flying tandem, they’ll pair you by weight and balance, not just who you showed up with, so plan for a 10 to 20 minute shuffle and keep cash or a card handy for any last-minute upgrades or photo add-ons.
Pack light, bring water and a hat, skip bulky bags, and if you want to lock in a specific time slot with less guesswork, a Viator tour can help with reserve now pay later, free cancellation, and verified reviews.
Weight Checks And Limits
Because Waikiki parasailing rides high on wind and balance, the crew will weigh you and your group at check-in, usually right on the dock, to match you with the safest flight setup.
You’ll step on a dock scale, shoes off, and they may check your bag, too.
Limits vary by boat, but they’ll state today’s min and max and hold firm safety margins when winds kick up.
For safety, many operators also enforce combined flight weight ranges that can change with wind conditions.
Plan 1 to 2 minutes per person, longer if the 9 a.m. crowd hits.
- Bring ID and a light rash guard.
- Skip backpacks, big cameras, and bottles.
- Share injuries, pregnancy, or meds.
- Follow guidance on weight distribution in your harness.
- If you’re over, rebook a later slot.
You won’t pay extra, but you might lose a deposit.
Tandem Pairing Process
Step onto the dock scale and you’ll see how your parasailing “team” gets built in real time. Staff notes your weight, then matches you for safe balance and Tandem choreography. If you’re solo, you’ll pair with another guest or fly triple only if wind and limits allow.
| You weigh | They aim for | What you do |
|---|---|---|
| Light | Medium partner | Relax, keep legs straight |
| Heavy | Similar partner | Skip breakfast, sip water |
Expect 10 to 20 minutes in a small crowd while the boat returns. Pairing psychology matters, they’ll also match calm talkers with nervous riders. Many operators price the ride separately from optional add-ons like photo packages, so budget for that at check-in. Bring sunscreen, a dry bag, and cash for photos, about $30. Skip bulky backpacks. Booking a Viator tour can lock a time, with reviews, free cancellation, and reserve now pay later.
Payment, Photo Packages, and Tipping Basics
Lock in your spot by sorting payment details early, so check-in feels like a smooth beach stroll instead of a last-minute scramble. Most docks take cards, but signal can lag, so bring a backup $40 to $80 for add-ons and easy cash handling. Before you head out, confirm the operator’s cancellation policy and any weather rescheduling rules so you’re not surprised if conditions change.
- Confirm taxes and fuel or harbor fees before you tap.
- Ask what photo package costs, usually $30 to $60.
- Choose digital files, or pay extra for souvenir prints.
- Stash small bills for tips, 10 to 20 percent if service shines.
- Skip buying shots blindly, preview thumbnails first.
If you booked through Viator, show the QR code, note verified reviews, and use reserve now pay later if you’re juggling plans. Arrive 20 minutes early, lines bunch at the top of the hour.
Gear Fitting: Harnesses and Secure Storage
Once you’ve checked in and signed the waivers, head straight to the gear table so the crew can fit your harness while the dock’s still calm.
You’ll step into the seat, then they’ll snug the leg loops and waist strap for a clean harness adjustment, not a squeeze.
Wear closed toe sandals or secure sneakers, skip flip flops, and keep pockets empty.
If you brought a phone, use a lanyard or hand it over for gear storage in the boat’s dry bin, usually free.
Small groups move fast, but weekend lines can add 10 minutes, so arrive early.
Sunscreen goes on now, not after.
Before you launch, the crew will also connect the harness to the towline and winch system, part of the boat’s essential parasailing gear.
Book a Viator tour if you want guaranteed time slots, verified reviews, and free cancellation with reserve now pay later.
Safety Briefing: Signals, Landing, and Water Dips
With your harness fitted and your phone tucked in the dry bin, you’ll circle up for a quick safety briefing on the dock or right on the boat before it idles out.
It runs about five minutes, and on busy mornings you’ll want to listen close for signal recognition and landing cues.
The crew will also remind you that feeling nervous is normal, and that trained crew guide your takeoff, flight, and landing step by step to help you feel safe.
- Thumbs up: you’re OK, go higher.
- Palm down: lower me.
- Tap your head: reel me in.
- On touchdown, bend knees, toes up.
- For water dips, follow splash procedures, keep hands on straps, and breathe steady.
Dips are usually free when seas are calm.
If you get queasy, take motion-sickness tablets 30 minutes ahead, about $8 nearby today too.
Bring strap-on sunglasses and a light rash guard, skip loose hats and dangling jewelry.
While You Wait: Seating, Boat Rules, and Photos
Although the briefing feels like the main event, you’ll usually spend 10 to 20 minutes waiting your turn, so grab a stable seat near the center of the boat where the bounce feels softer and your bag stays dry. Practice seating etiquette: leave the aisle clear, share the shaded bench, and tuck sandals under your seat. In busier midmorning runs, you’ll swap spots as crews balance weight, so keep your bag zipped. For the smoothest ride and best shots, the center seats usually feel the most stable while still giving you a clear angle for photos. Photo add-ons run about $40 to $60; for your own shots, use a wrist strap and burst mode, my best camera tips.
| Moment | Do | Feel |
|---|---|---|
| Wait | Sip water | Anticipation |
| Rule check | Hold rail | Steady |
| Photo prep | Strap phone | Relief |
Skip big backpacks, bring reef-safe sunscreen, and keep cash for tips too.
Boarding the Boat: The Step-by-Step Flow
Your name gets called, the crew gives you a quick nod, and the waiting bench suddenly feels far away. You walk the dock with your waiver wristband showing, salt air on your lips, and follow the boarding flow without guessing.
Your name’s called; the crew nods. Wristband flashing, you breathe salt air and step onto the dock without hesitation.
- Show your name and weight to the deckhand
- Hand over your bag, keep only sunscreen and water
- Step down carefully, one hand on the rail
- Take the assigned seat, stow sandals under it
- Listen for the step sequence, then clip your life jacket
You’ll likely feel a little ocean spray once the boat gets moving, so keep your phone zipped and anything loose secured. Expect 5 minutes from call to cast-off if you’re ready. Tips: bring cash for photos later, skip bulky towels. If you booked a Viator tour, verified reviews help, plus free cancellation and reserve now pay later.
Phone zipped, hat on, set.
Common Dock Delays (and How to Avoid Them)
If you hit the Waikiki dock right at check-in, you’ll still see the clock slip thanks to a few predictable bottlenecks. Lines form for waivers, ID checks, and quick weigh-ins, and the crew won’t load until every seat’s confirmed. Harbor rules can pause departures when boat traffic stacks up in the channel, or when tide schedules force a later push-off. Since Waikiki tours can use different launch points, double-check your departure pier in your confirmation so you’re not delayed by walking to the wrong dock.
Show up 20 minutes early, stash your phone in a dry pouch, and keep your booking email and a card ready. Budget about $10 for parking and small bills for tips, but skip big backpacks. Morning slots usually move faster than sunset crowds. If timing’s tight, a Viator tour with reviews can lock in tickets, offer hotel pickup, and cancellation with reserve pay later.
Frequently Asked Questions
What if I Get Seasick, Can I Take Medication Before Parasailing?
Yes you can take motion sickness medication beforehand, but follow label directions and check with your doctor if you’re pregnant, medicated, or sensitive. Take it early, eat lightly, hydrate, and bring ginger as preventative measures.
Is Parasailing Safe for Pregnant Guests or Those With Medical Conditions?
It’s not always safe, here’s the catch: you’ll face strict pregnancy restrictions, and you should skip parasailing if you’re pregnant. For medical conditions, you must complete medical screening and get your doctor’s okay before flying today.
Can I Parasail With Glasses or Contact Lenses Without Losing Them?
Yes, you can parasail with glasses or contacts if you use secure eyewear like a strap or float. Contacts usually stay put, but bring sunglasses alternatives and store backups onshore in a dry bag ashore.
What Happens if My Flight Is Canceled Due to Weather, Refund or Reschedule?
About 20% of ocean tours face weather delays. If your flight’s canceled, you’ll get a full refund under our refund policy or you can pick reschedule options for the next available day, no fees, no hassle.
Are There Age or Height Requirements for Children to Parasail?
You’ll usually need your child to meet a minimum age (often 5–7) and fit junior weightlimits, not height. Crew handles child harnessing, but you must confirm exact limits with your operator before booking each day.
Conclusion
Show up at Kewalo Basin 30 minutes early and you’ll breeze through ID, QR scan, waiver, wristband, and the quick weigh-in. Bring sunscreen, cash or card for any balance, and a phone lanyard; skip bulky bags and jewelry. Crowds spike midmorning, so book an early slot, or use a Viator tour for verified reviews, free cancellation, and reserve now pay later. Then listen, clip in, and fly into salty air. Like clockwork, the dock moves.