You’re floating behind the boat, yet your best shots start on the deck. Claim a stern corner on the upper level, windward if you can, and keep the tow line out of your frame while you catch the chute, rider, and frothy wake in one clean angle. Bring a wrist tether, polarizer, and a small towel, skip the big backpack. Book an early slot to dodge glare and crowds, and if a Viator tour with verified reviews and free cancellation helps with timing, you’ll still want to know which side to stand on when the reel-in starts…
Key Takeaways
- Shoot from the stern corner near the tow line to capture lift-off, rope line, parasail rise, and wake in one frame.
- Use the stern rail or winch area for close-up crew, gear, and reel-in landing shots with clear towline visibility.
- Choose the upper deck near the stern for smoother motion and higher angles, fitting canopy and shoreline into wider compositions.
- Move to the bow or front upper deck for panoramic horizon shots, especially during the first 20 minutes on calmer water.
- Board 10–20 minutes early to claim rail space; sit windward to reduce spray and keep lenses cleaner.
Best Spot on the Boat for Parasailing Photos
Two spots on the boat consistently deliver your best parasailing shots: the stern corner near the tow line for action, and the shaded side rail midship for steady, flattering light. Spray from the wake is heaviest toward the stern and lighter midship, so balance your camera angle with how wet you’re willing to get.
Two boat spots nail parasailing photos: stern corner by the tow line for action, shaded midship rail for flattering light.
Get there early, before the first launch, and claim a handhold and room. At the stern, shoot bursts as the canopy lifts, then switch to midship when chop makes you wobble.
Dial camera settings: shutter 1/1000 for spray, ISO auto, and a touch of exposure compensation for water.
Follow crew safety protocols, stay behind marked lines, and keep one hand free for rails.
Bring a dry bag, sunglasses, and a lens cloth. Skip big tripods.
If timing’s tight, a Viator option with verified reviews, hotel pickup, free cancellation, and reserve-now pay-later perks handles logistics.
First: Keep the Tow Line Out of Frame
Once you’ve staked out your spot on the stern or along the side rail, your next win is simple: frame clean and keep the tow line out of your shot. Scan for it before you lift the camera, then shift a step or tilt up so the rope disappears into sky or water. When you’re juggling cameras or phones near the rail, use wrist tethers or floaty straps so your gear stays secure if you lose your grip. Use portrait orientation to isolate the flyer and canopy, and leave extra space on the side the parasail’s moving toward. These composition tips beat frantic cropping later.
Dial in camera settings early: shutter 1/1000, burst mode, and a touch of negative exposure to hold clouds. Bring a microfiber cloth for sea spray, skip lens swaps in wind.
If your boat’s packed, shoot during the first lift, when people settle back in.
Where You Can Stand (Safely) for Photos
On most parasailing boats, the safest photo real estate sits low and aft, near the stern rail but outside the launch lane. Plant your feet wide, keep one hand on a grab rail, and let the deck’s gentle sway settle before you shoot. If the boat’s moving fast, tuck in behind a seatback to cut wind and salt spray. For the best balance of comfort and views, many riders prefer top spots toward the stern where motion is smoother and you still get clean sightlines of the chute. For camera safety, use a wrist strap, skip lens changes, and stash a dry bag under the bench. Aim for early trips when the water’s calmer and the deck’s less crowded, usually the first 9 to 10 a.m. slot. Expect $80–$140 plus tips. For composition tips, shoot diagonally across the wake for leading lines, then step two paces to reframe, not to roam too much.
Best Spot for Parasailing Launch and Lift-Off
Head up to the stern corner that gives you a clear view of the launch lane, usually just outside the towline’s path, and you’ll catch the best lift-off shots without getting in anyone’s way. For Waikiki trips, everything starts at the parasailing dock check-in, so arrive early there to make sure you board in time to claim this stern corner spot.
Plant your feet, keep the rail at your hip, and watch for safety signals before you raise the camera.
- Shoot in burst mode as the canopy inflates and the rider steps in.
- Wait for crew coordination cues, then frame hands, harness, and taut line.
- Pack a dry bag, polarized sunglasses, and a $20 tip, skip loose hats.
Aim to board 10 minutes early since the stern gets crowded fast.
If you want timing, a Viator slot with reviews, hotel pickup, free cancellation, and reserve now pay later can streamline logistics.

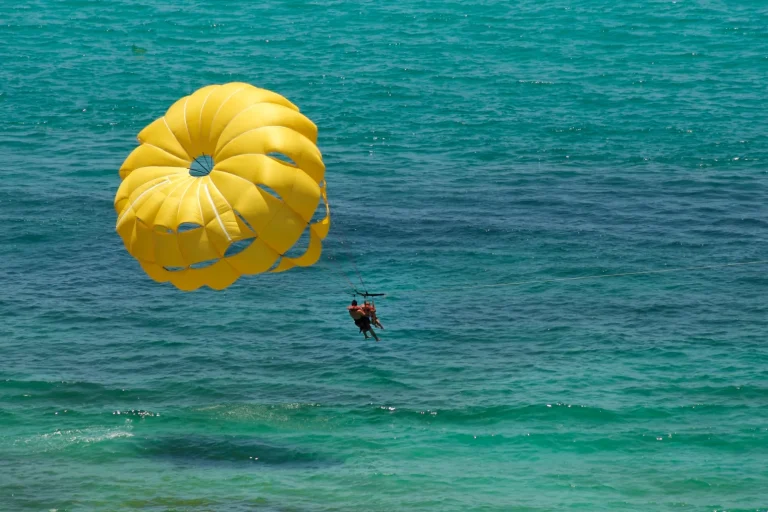
Best Spot for Wide Parasailing Horizon Shots
For a clean, wide horizon, head to the bow early, around 30 minutes before lift-off, when the deck’s quieter and the light feels soft and salty. To make these shots really pop, pair this vantage point with top GoPro settings like a wide field of view and high frame rate for smooth, cinematic parasailing clips.
If the bow’s crowded, climb to the upper deck for panoramic angles and steadier lines, just keep a light windbreaker, polarized sunglasses, and a wrist strap, and skip big hats that love to fly.
On busy days, a Viator parasailing tour can lock in a timed slot with verified reviews, hotel pickup, free cancellation, and reserve now pay later, so you’re not paying extra at the pier while you wait.
Bow View For Horizons
From the bow, you get the cleanest sweep of sea and sky, which makes it the best place to frame those wide parasailing horizon shots without clutter. Arrive 10 minutes early to claim the tip before the group crowds in. At golden hour, the water turns copper and your flyer pops against soft clouds. For truly unforgettable Epic Waikiki parasailing memories, time your bow shots to capture both the flyer and Diamond Head in the same wide frame.
- Brace elbows on the rail, and use the rope and wake as leading lines.
- Bring a lens cloth, hat strap, and dry bag, spray hits hard.
- Skip flip flops, and set burst mode before takeoff.
Expect $70 to $120 per flight, photos cost extra. If you need timing, book a Viator ride with verified reviews, free cancellation, and reserve pay later. Keep a hand for balance when the boat turns.
Upper Deck Panoramas
With a step up to the upper deck, you’ll trade the bow’s bustle for a higher, cleaner panorama where the parasail floats against a long, unbroken horizon. You’ll get steadier footing, fewer heads in frame, and better wind for upper deck storytelling. Aim for panoramic composition, level the rail with the horizon, and shoot during the first 20 minutes out, when the sea looks glassier. Expect an upcharge on boats, about $5 to access the top, but it’s worth it. From higher up, you can also capture how different Waikiki parasailing launch points shape the angle and backdrop of your photos as the boat moves offshore.
| Do | Skip |
|---|---|
| Arrive 10 min early | Lean on the rail |
| Use 0.5x wide lens | Flash at noon |
| Pack a microfiber cloth | Loose hats |
Bring sunscreen, a lanyard, and water, crowds thin after 2 pm. Viator offers verified reviews, reserve now, pay later, free cancellation.
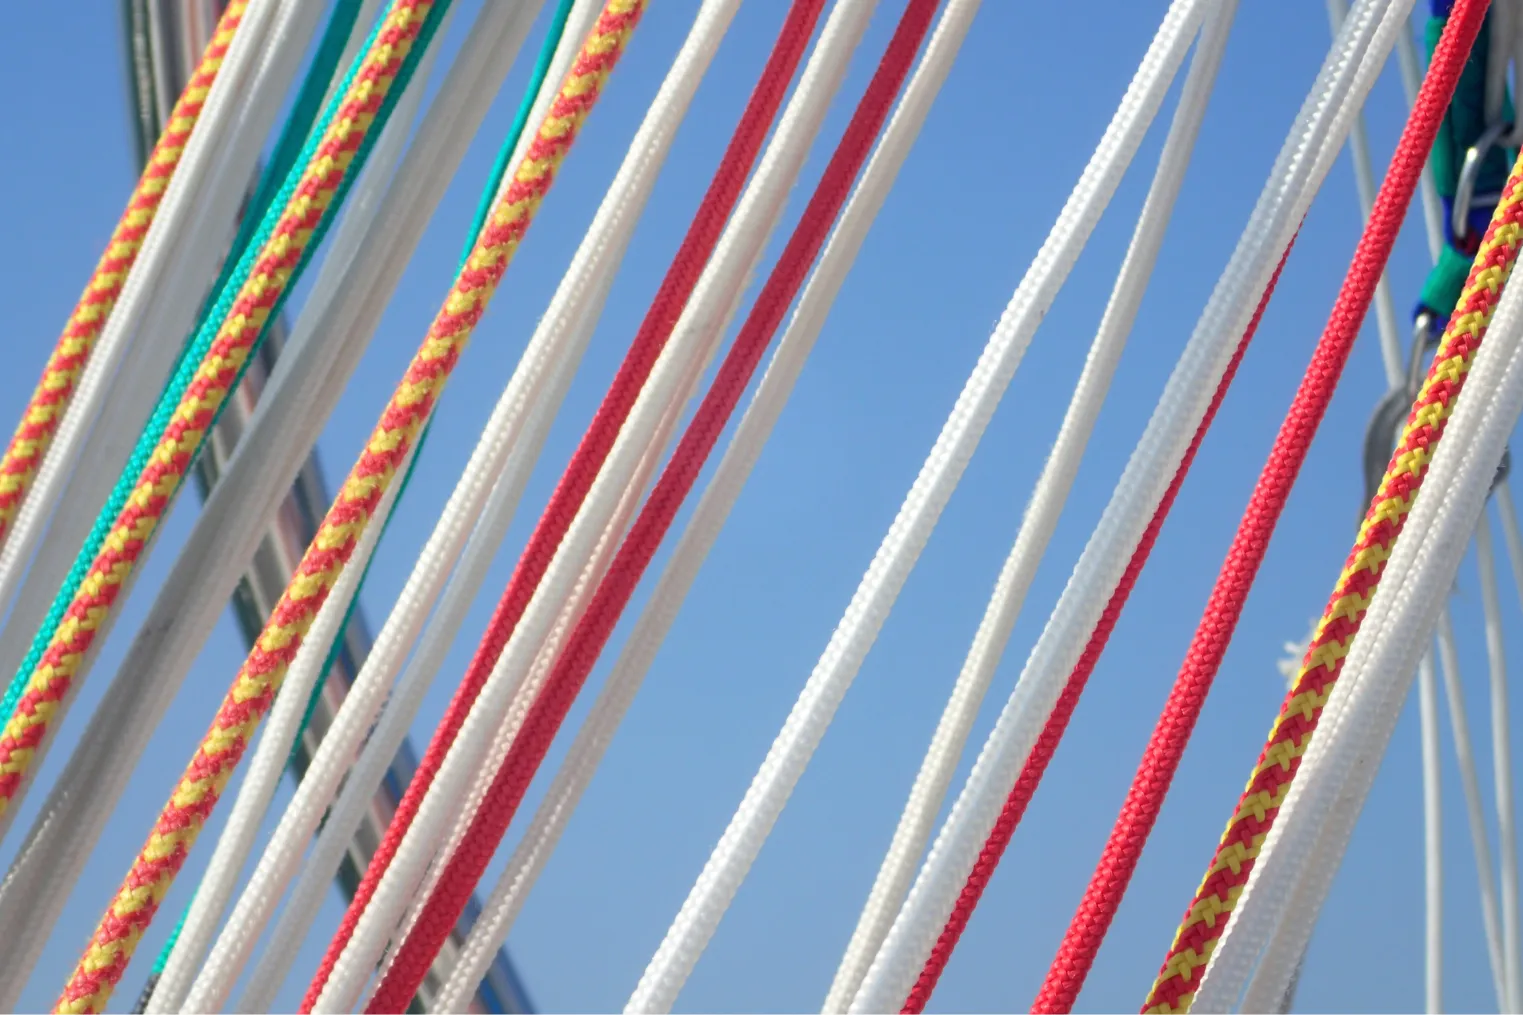
Best Spot for Close-Up Parasailing Deck Shots
Although the action’s out on the water, the best spot for close-up parasailing deck shots is usually right beside the winch area on the stern, just off the rope line where crew can still work without you in the way. This spot also gives you an unobstructed view of the harness, towline, and winch as crew clip and manage the gear, making it easier to capture sharp, detailed shots of the essential equipment in action.
Get there 10 minutes before harnessing starts, when the deck’s calmer and you can frame hands, clips, and grins in close up perspectives. Use deck lighting techniques by turning your back to the sun, letting the canopy shade soften faces.
- Wear a wrist strap and keep both hands free.
- Shoot wide at 24–35mm, then punch in for details.
- Skip big backpacks, they snag rails and annoy everyone.
Expect $5 to $20 for onboard photo add-ons, so bring your camera and a dry pouch.
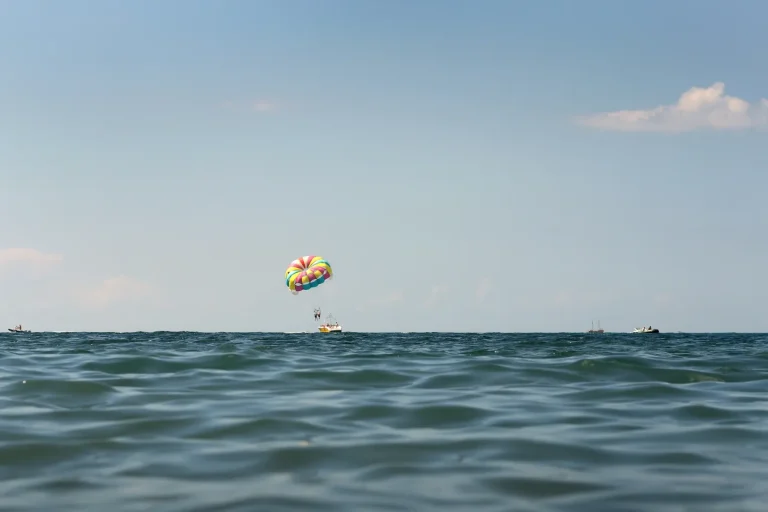
Best Spot for Parasailing Photos During the Tow
For the tow, claim a stern view angle so you can frame the rope line, the parasail rising, and that foamy wake in one clean shot. On many Waikiki runs the big boat parasailing setup gives you extra rail space and a higher vantage, which helps you keep both the chute and shoreline in frame. If the wind’s up, slide to windward side seating to dodge spray and keep your lens crisp, and bring a microfiber cloth and a hat clip, skip the bulky tripod. On busy boats you’ll want to grab your spot 10 minutes before launch, and if you’re booking through Viator, pick a tow time with verified reviews, hotel pickup, free cancellation, and reserve now pay later so you’re not scrambling at the dock.
Stern View Angle
From the stern, you get the cleanest, most story-rich angle during the tow: the rope slicing straight back, the parasail centered, and the boat’s foamy wake leading your eye right to the flyers. To make the shot iconic in Waikiki, frame the riders so the sail and towline lead toward Diamond Head on the horizon during the highest part of the flight.
Plant your feet near the transom rail, brace for spray, and shoot in brief bursts when the captain steadies speed, 8 to 10 minutes after launch.
Glare can flatten color, so aim for afternoon when aft reflections glitter and a stern silhouette pops against the sky.
- Polarized sunglasses to spot glare shifts
- A phone lanyard or dry bag, $10 dockside
- Skip big lenses, they bounce and hog space
If the boat’s packed, arrive 20 minutes early, or book a Viator slot with reviews, pickup, free cancellation, and reserve now, pay later.
Windward Side Seating
On the windward side, you’ll ride the cleaner air and get the sharpest, least hazy tow shots, since the breeze keeps exhaust and spray drifting away from your lens. If you’re prone to motion sickness, try facing the horizon, avoid heavy meals beforehand, and use these parasailing motion sickness tips so you can stay focused on shooting instead of feeling queasy.
Grab windward seating early, before the captain calls the next flyer, and sit near midship for motion comfort.
You’ll feel fewer jolts than at the bow, and your horizon stays steadier.
Keep a polarizer handy, wipe salt with a microfiber cloth, and clip your phone or camera to a wrist lanyard.
Skip swapping lenses on deck.
Aim for the first 10 minutes of tow, when the rope’s taut and the wake lines look graphic.
If you’re booking, some Viator tours help with hotel pickup, verified reviews, and free cancellation, plus reserve now pay later today.
Best Spot for Parasailing Landing and Reel-In
Although the flight feels like the main event, your best parasailing photos often happen in the last two minutes, so the landing and reel-in spot matters. Plant yourself near the stern rail with a clear view of the towline and the crew. From here you can frame the landing choreography, capture faces as feet skim the deck, and stay clear of splash zones. Follow the reel mechanics: the winch hums, the rope shortens, and the harness swings in. In smaller groups, you’ll often get a clearer view of the crew and chute, which makes Waikiki parasailing landing shots feel more relaxed and personal.
Your best parasailing photos happen in the final two minutes, pick the right landing and reel-in spot.
- Keep a dry pouch, a microfiber cloth, and a small bill for tip.
- Ask the deckhand when the “touchdown” will start, usually 60–90 seconds out.
- Skip the bow crowds, and hold your phone low for steadier shots. If you book a Viator tour, choose free cancellation.
Use Sun, Glare, and Wind to Pick Your Side
Your reel-in spot sets you up for the finale, but the side of the boat you choose decides whether your shots look sun-kissed or washed out in glare. Check sun positioning first: stand on the shady side when the sun sits low, and swap sides as the captain turns. Use glare management like a visor or polarizer, and keep your lens hood on. If you’re timing your ride for golden hour parasailing in Waikiki, aim for the last flights before sunset so the low, warm sun lights both the chute and the skyline.
| Condition | Best side | Feeling |
|---|---|---|
| Sun ahead | Opposite rail | Rich, golden |
| Sun behind you | Same rail | Crisp, clean |
| Choppy wind | Upwind rail | Steady, brave |
| Crosswind spray | Downwind rail | Salty, wild |
Arrive 20 minutes early to claim space, and expect $80 to $150 rides. Skip bulky bags, bring a dry pouch, and brace your knees when gusts hit. Weekends crowd rails, move quickly.
Frequently Asked Questions
How Do I Protect My Phone or Camera From Saltwater Spray?
Slip your phone or camera into waterproof pouches, seal them tight, and keep them off wet surfaces. Wipe spray immediately with microfiber cloths. Store gear in a dry bag with silica gel packets between shots.
Should I Use a Polarized Filter or Lens Hood for Parasailing Shots?
Like sun on water, a polarizer cuts glare, use it for parasailing; you’ll get polarizing benefits: richer skies and seas. Add a hood only as backup, since hood limitations mean it won’t tame reflections in spray.
What Camera Settings Work Best for Fast Action Over Water?
Use a high shutter (1/1000+), wide aperture, and high ISO as needed to freeze splashes and riders. You’ll use continuous autofocus with burst mode, and keep exposure compensation slightly down to protect water highlights too.
Can I Bring a Drone to Photograph Parasailing From the Boat?
You can bring a drone, but you’ll face limits, just as the boat rocks and the towline snaps taut, check drone regulations, ask the captain, and confirm insurance requirements before launching near people, lines, or spray.
Do I Need Permission to Photograph Other Passengers During the Trip?
Yes, you should ask first. Follow consent etiquette: get clear verbal permission before filming or posting identifiable passengers. Privacy laws vary by location and operator, so check waivers and crew guidance, especially for kids too.
Conclusion
Claim that stern corner by the tow line, brace windward, and you’ll frame chute, rider, and wake without stray ropes. Shoot bursts at lift-off and reel-in, then relax during the tow. In Key West, I watched a dad snag his sharpest shot right as the winch paused. Morning trips run calmer and glare’s softer, and you’ll dodge the noon crowd for about $75 to $120. Bring a wrist tether, plus a polarizer, skip bulky backpacks.