You’ve got 20 minutes before the dock gets crowded and your iPhone’s full of salty, shaky clips, so you set 9:16 first, lock exposure on the sky, and keep the horizon level with a quick crop. Back on stable ground, you AirDrop everything, label takeoff, glide, splash, then build a tight 10-minute rough cut. A $10 lanyard beats a cracked screen, and you can skip heavy filters. Wind noise is the real villain, and it’s fixable, if you do it right…
Key Takeaways
- Choose CapCut or VN for free/cheap edits, or LumaFusion (~$30), and ensure gimbal stabilization won’t conflict with the app.
- Shoot and edit for vertical 9:16 from the start, keeping the horizon level and leaving room for captions on Shorts.
- Import clips on stable ground via AirDrop or a $20 card reader, file into one album, and log scenes (Dock, Takeoff, Glide).
- Make fast selects by favoriting clean-horizon highlights and key audio moments, and tag problems (shake, salt spray, keeper audio) with colors.
- Export per platform: 1080×1920 at 30 fps (or 60 for jittery spins), highest/15–25 Mbps bitrate, then upload on stable Wi‑Fi.

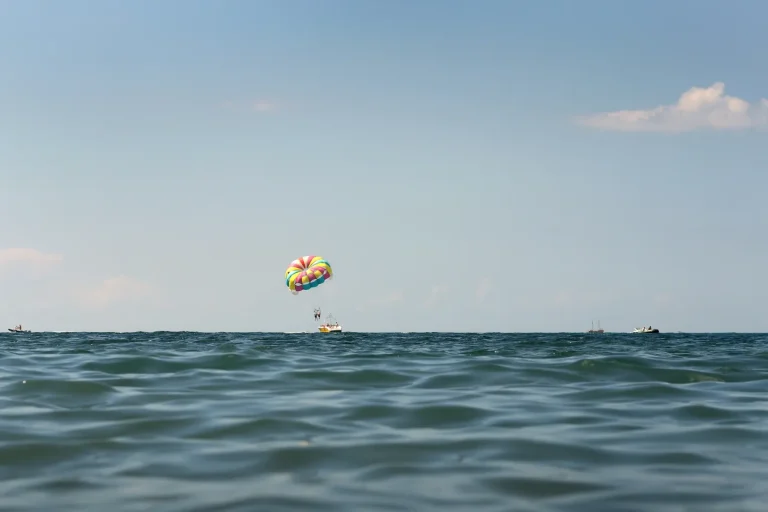
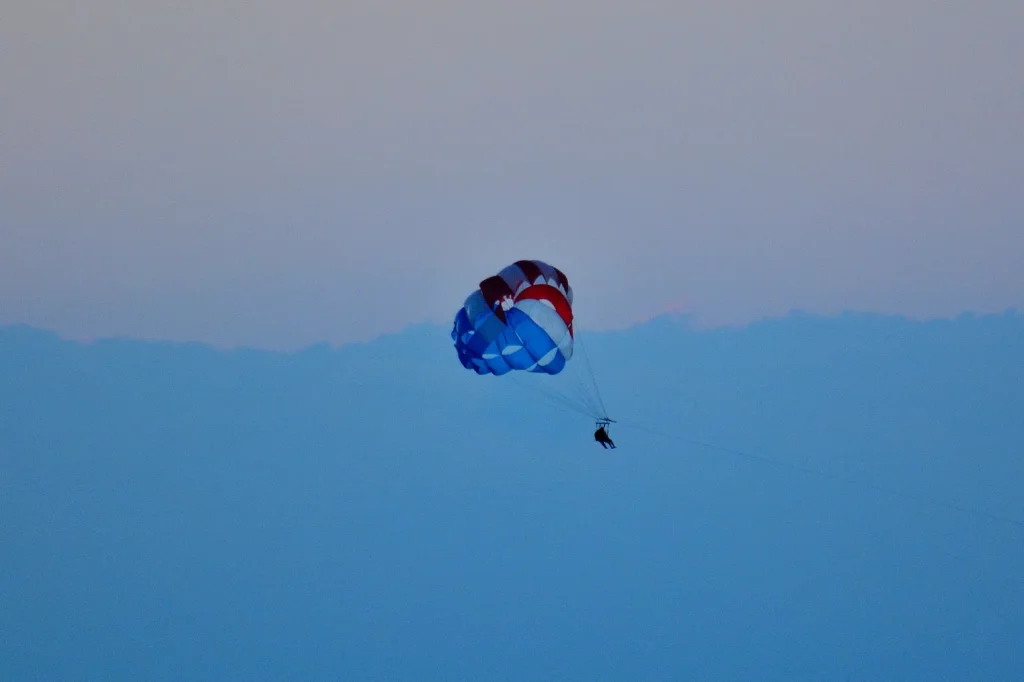
Parasailing Experience in Waikiki, HI
Experience the thrill of Oahu parasailing on this unforgettable 1-hour adventure from Waikiki. Soar up to 1,000 feet above the stunning south shore of...

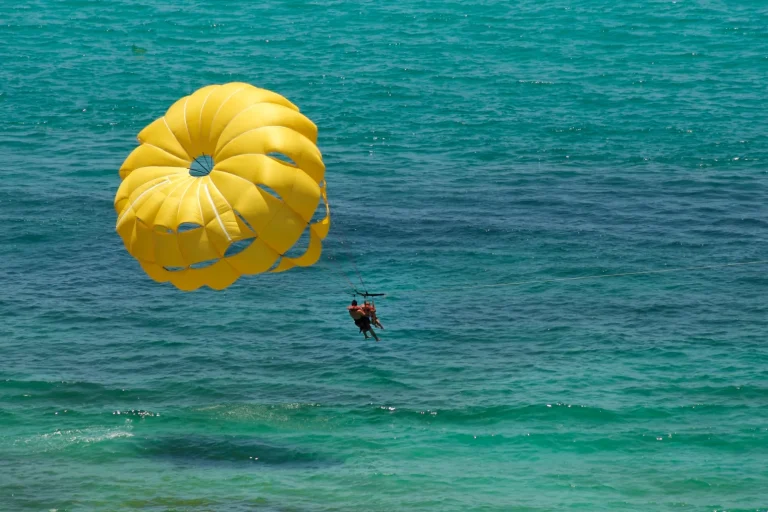
Waikiki Parasailing in Hawaii from Oahu
Experience the thrill of parasailing over Hawaii’s stunning coastline as you glide above crystal-clear waters and...

Oahu: The Magical Mystery Show! at Hilton Waikiki Beach Hotel
Step back in Hawaii's history to 1881 when King Kalakaua visited London. You've found the hidden gem of Oahu. This i...

Oahu: Kualoa Ranch UTV Raptor Tour
Traveling with family and friends? You can enjoy the fantastic Multi-passenger UTV Raptor experience with your entir...
Choose an iPhone Editor for Parasailing Clips
Start by picking an iPhone editor that matches how you actually shoot parasailing, because sun glare, wind noise, and fast horizon swings can make “easy” edits feel fiddly. If you fly with an action cam or a phone on a rig, check gimbal compatibility so stabilization doesn’t fight your footage. CapCut and VN stay cheap or free, while LumaFusion costs about $30 and feels like a carry on studio. For choppy waves and quick turns, look for frame interpolation to smooth 60 to 30 fps slow motion. Set up app shortcuts for auto import, trim, and a one tap color boost. Since you often can’t safely handle your phone mid flight, think ahead about whether phones are allowed on your parasailing setup and how that will affect what you’re editing later. Finally, plan battery management: start at 80 percent, switch to airplane mode, and pack a slim power bank for the pier queue later.
Set Aspect Ratio First (Reels/TikTok/YouTube)
Once you’ve picked your editor and sorted battery life, lock in your aspect ratio before you trim a single wave splash. Vertical planning saves you from re-cropping sky, harness, and shoreline later, and it keeps titles clear on small screens. Check platform specs, then set the canvas and safe zones while you’re still fresh. Parasailing over Waikiki is the perfect time to think about capturing epic moments that will look great in vertical format later.
| Platform | Best ratio |
|---|---|
| Reels or TikTok | 9:16 vertical |
| YouTube Shorts | 9:16, keep captions high |
Shoot with a phone lanyard, and wipe salt spray off the lens. If you’re editing on the boat ride back, pick a shaded seat and skip heavy filters that heat your iPhone. For calm color, budget 2 minutes per clip to nudge exposure and keep the ocean turquoise. Aim for noon light, but avoid crowded docks.
Import and Label Your Parasailing Footage Fast
Kick things off by importing your clips the minute you’re back on stable ground, while the salt is still drying on your phone case and the ride is fresh in your head. Best waterproof phone cases for parasailing in Waikiki can help keep your footage safe and dry so you actually have something to edit later. AirDrop them in or use a $20 card reader, and file everything into one album.
Do quick shot logging before the marina crowd thins. Add scene numbers: 01 Dock, 02 Takeoff, 03 Glide. Make quick selects by favoriting the clean horizon, the boat pass, the nervous laugh on lift. Use tag colors to flag issues: red for shake, yellow for salt spray, blue for keeper audio. Skip long zooms, dead air, and shots of your feet. Wipe with a microfiber cloth, and top up with a power bank at the dock.

Hanauma Bay Snorkeling from Waikiki
Experience Hanauma Bay the easiest way with Waikiki’s most reliable Hanauma Bay shuttle. Our early 5:40 AM pickup...
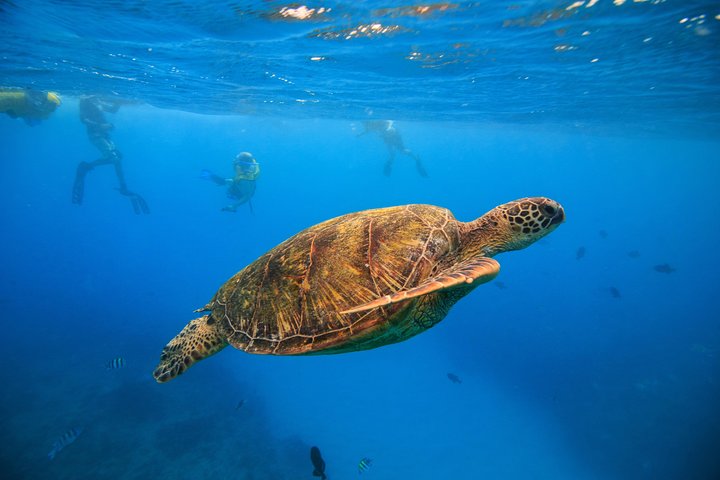
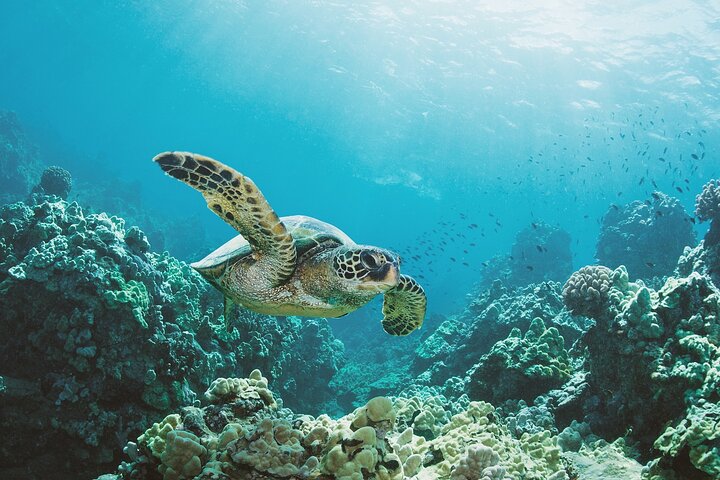
Waikiki, Hawaii: Turtle Canyon Snorkel Excursion
Discover the magic of snorkeling with Hawaiian Green Sea Turtles at Waikiki’s famous Turtle Canyon. On this 2-hour...
Oahu Dolphin and Snorkel Tour with Waikiki Pickup & Lunch
Join one of Oahu’s most popular ocean adventures and experience why over 300,000 guests have fallen in love with t...
Assemble a 10-Minute Rough Cut on iPhone
Ten focused minutes of rough-cutting on your iPhone can turn that sun-glare chaos into a watchable 10-minute story before the marina Wi‑Fi bogs down and your battery taps out. Open iMovie, drop labeled clips into one timeline, and arrange camera angles for clear beats. Keep narrative pacing in mind, but don’t fuss. Shoot for 10:00 so you can export on cellular in under 3 minutes. When you’re choosing which clips to keep, prioritize the shots where the boat is framed cleanly from the side or rear, since these are usually the best spot on the boat angles for seeing both the chute and the rider clearly.
- Dock setup, 20s.
- Boat ride, 30s.
- Flight highlights, 7–8m.
- Return and wrap, 40s.
Bring a power bank, skip filters, and note tips run about $5 to $10. Midmorning docks crowd up, so assemble while you’re waiting in shade. If you used a Viator tour, confirm hotel pickup, reserve now pay later, and free cancellation details.
Trim for Pace: Lift, Glide, Splashdown
Scrub through your timeline and start trimming hard so the video hits three clean beats: lift, glide, splashdown. Cut dock chatter, harness fumbling, and empty sky. Keep 3 to 5 seconds of the boat pull and your feet leaving the deck, then jump to a glide that runs 8 to 12 seconds. Whether you rely on your iPhone clips or invest in the crew’s parasailing photo package, decide early so you can frame your shots to complement each other instead of duplicating angles. For rhythmic shifts, match cuts to wind gusts, rope snaps, or a wave slap. Your emotional pacing should rise on ascent, breathe midair, then tighten on descent and first spray. Skip shaky zooms and forced selfies. Bring a microfiber cloth for salt, and skip filters. Tours often run $60 to $120 and crowds peak after 11 a.m. If Viator’s verified reviews help, reserve now pay later, with hotel pickup and free cancellation.
Stabilize Shaky Parasailing Footage (iPhone)
Once you’ve cut your parasailing run into lift, glide, and splashdown, any leftover wobble stands out like a flapping flag in the sea breeze. If you shot with top GoPro settings, your stabilized clips will hold more detail and color when you smooth out the shake on iPhone.
On iPhone, open the clip in Photos or iMovie and turn on Stabilization, then preview at full screen. Expect a tiny zoom and less seasick sway, but watch for motion blur on fast spins. Do it right after landing, and keep a small power bank handy.
- Set stabilization low first, then nudge up until the rope and wake stop twitching.
- Trim a second off the start and end, stabilization hates jerky taps.
- If your editor offers horizon lock, leave it off for now and focus on shake only.
- Export at 1080p, it’s quicker on café Wi‑Fi and still looks crisp.
Level the Horizon + Crop for Cleaner Framing
After stabilization settles the jitters, a tilted horizon becomes the next giveaway, especially when the sea line slices through your frame like it’s rushing downhill. In Photos or iMovie, tap Crop, then rotate until the waterline sits level. Use the grid as your horizon correction cheat sheet, and watch the parasail rope so it stays straight. For smoother storytelling, cut your clips so they start and end on natural parasailing poses that feel relaxed, like when your legs are loose and your shoulders drop.
Next, crop with intent. Trim away the boat wake, a stray selfie arm, or extra sky. Aim for framing balance: place you and the canopy off center, and leave space in the direction you’re drifting. Do this back at the hotel, not on a windy dock. Bring a microfiber cloth for salt spray, and skip heavy filters for now. You paid $60, so keep the view premium today.
Fix Exposure for Bright Sky and Dark Water
Dial in your exposure before that bright sky blows out and the water turns into a dark slab. In Photos or CapCut, scrub to a clean moment, then lower Exposure a touch and lift Shadows until the wake shows texture. Use graduated filters to darken just the upper frame, keeping the horizon natural. If your app supports exposure blending, stack a slightly darker duplicate clip and mask the sky for a quick fix. Aim for a balanced look, like late-afternoon haze. When you’re reviewing your footage, remember that clear, properly exposed video also helps you spot details related to parasailing safety in Waikiki, like boat distance, harness fit, and changing weather.
> Tame the sky, rescue the water: drop Exposure, lift Shadows, and grad-filter the top for a late-afternoon balance.
- Edit on Wi‑Fi at your hotel, not on the dock.
- Budget $0 to $10 for an app upgrade, skip pricey packs.
- Bring a microfiber cloth, salt spray lies.
- Work early, crowds thin and your screen’s easier to read.
Reduce Glare and Blown Highlights Over the Ocean
Out over the open water, that hard noon sun can turn the sea into a sheet of glare and bleach your highlights in seconds, so plan to edit right after the ride while the details are fresh. Since the perfect time to parasail over Waikiki is usually earlier or later in the day, try to schedule your ride then so your footage starts with softer, more balanced light.
Start by taming the ocean shimmer, then recover highlight texture in the wake and harness, and you’ll keep the shot crisp without making it look muddy.
Finally, balance the sky and sea so neither steals the scene, and if you booked a Viator parasailing slot, verified reviews, hotel pickup, free cancellation, and reserve now pay later can help you snag an early-morning time with softer light and fewer boats.

Waikiki: 2-hour Turtle Canyon Snorkeling Adventure
Join us for a 2-hour snorkeling adventure at Turtle Canyon, one of Oahu’s top snorkeling spots! Cruise along the s...
Waikiki: Turtle Canyon Snorkel Adventure on Oahu
Enjoy an exclusive snorkeling adventure in Waikiki with small group sizes for a comfortable and VIP experience. You...

Kaneohe Sandbar Afternoon Snorkeling Tour
LIMITED TIME GROUP OFFER: Book your spot by May 24th and save big!The Kaneohe Sandbar is one of the best places ar...
Tame Ocean Glare
Often, the hardest part of parasailing footage isn’t the height, it’s the ocean’s glare turning your sea into a white sheet and blowing out the highlights. Before you even launch iMovie or CapCut, set yourself up on the boat: shoot 10 minutes after takeoff when the sun sits higher, and angle slightly off the sun to cut sparkle. For cleaner footage right out of the camera, use perfect GoPro mounts to lock in a stable angle that keeps the horizon level and reflections consistent.
- Clip on polarizing filters for reflection control, $15–$40, and rotate until the water deepens.
- Shade the lens with your hand or a cap brim, skip smudgy sunglasses tricks.
- Tap and hold to lock exposure, then nudge it down a hair for calmer whites.
- Keep the horizon clean, wipe the lens, and avoid crowded docks where spray hits your phone in salty wind.
Recover Highlight Detail
Chase those blown-out whites before you settle in for a full edit, because a few quick tweaks can bring back cloud texture and turn that washed sea into real blue again. In Photos or CapCut, tap Adjust, pull Highlights down until the foam stops glowing, then nudge Exposure down a hair. Use Brilliance or HDR gently for highlight recovery, too much turns surfers into ghosts. Before you even start editing, protect your phone from saltwater damage on the boat or beach so corrosion doesn’t ruin both your device and your footage later.
Next, lift Shadows just enough for shadow rescue on your harness, face, and parachute lines. Scrub the clip at 0.25x speed to spot flicker. Do this in a quiet café after your tour, not on the windy dock. Skip heavy filters. Bring a power bank and a microfiber cloth. Export a quick test, then commit before you post it.
Balance Sky And Sea
On a bright noon run, when the sun hits the water like a mirror, you’ve got to balance sky and sea before the glare turns your parasailing clip into a white sheet with a horizon. In Photos or CapCut, work fast, it takes 3 minutes and saves the shot. No extra apps, free tools. When the breeze builds and the boat adjusts its line, changing wind conditions can also shift reflections and brightness across the water, so be ready to tweak exposure mid-session for each new clip.
- Drop Highlights and Whites until waves show texture, then lift Shadows a touch for the boat.
- Nudge Exposure down in tiny taps, keep faces natural, skip heavy filters.
- Warm the sky with color balance, cool the ocean slightly, so blues don’t go gray.
- Add a hint of contrast and sharpen just enough to restore horizon contrast.
Bring a microfiber cloth, and avoid 12 to 2 glare.
Color-Grade Teal Water and Blue Skies on iPhone
With salt still drying on your phone case, you can make that parasailing footage pop by nudging the water toward teal and keeping the sky a clean, believable blue, all without leaving your iPhone. In Photos, start with exposure and highlights so clouds don’t blow out, then lift shadows on the harness. If you framed Honolulu right, adjust your crop so Diamond Head sits clearly in the corner of the shot, anchoring the skyline behind your parasail.
Next, lean into teal grading: nudge aqua toward green, add a little saturation, and reduce blue saturation in the sky so it stays crisp, not neon. For coastal contrast, add a gentle S curve or raise contrast 5 points, then warm skin tones slightly. Do a 10 minute pass in shade, wipe the lens, and export at 4K. Skip heavy filters, they date fast. It costs $0, and you’ll finish before landing.
Clean Wind Noise and Balance Audio Levels
Up in the harness, wind hits your mic like a sandblaster, so you’ll want a quick noise-reduction pass on your iPhone before you export, and it only takes a minute in your hotel room. If you’re prone to motion sickness, taking a few parasailing nausea precautions before you fly can help you stay comfortable enough to focus on filming and editing later. Next, you’ll normalize your voice and your music so the captain’s callouts and your laugh don’t vanish under the soundtrack, and you won’t force viewers to ride the volume buttons. Pack a small plug-in lav mic with a foam windscreen, skip the tinny onboard speaker audio if you can, and if you’re booking via a Viator parasailing tour with verified reviews, hotel pickup, free cancellation, and reserve now pay later, ask about departure timing to dodge the noisiest midday gusts.
Reduce Wind Noise Fast
Dial down that roar and your parasailing clip suddenly feels like a real travel memory, not a hair dryer caught on camera. On your iPhone, open the clip in iMovie or CapCut and fix the wind before you chase color. If you filmed with smart microphone placement, like tucking a lav inside your life vest, you’ll have an easier job. If you wore glasses or contacts while filming, be mindful that wind protection tips for your eyes also help keep stray gusts off your mic and reduce noise at the source.
Then:
- Duplicate the audio, so you can revert fast.
- Add a wind reduction or noise removal slider, stop when voices stay crisp.
- Use frequency trimming with an EQ, cut lows around 80 to 120 Hz, test with earbuds on the boat ride back.
- Fade in and out at takeoff and splashdown, where gusts spike.
Skip pricey plug-ins, your $20 foam mic cover does more.

Polynesian Cultural Center: Gateway Buffet Package
Located on O‘ahu’s North Shore, the Polynesian Cultural Center is a one-of-a-kind attraction showcasing the peop...

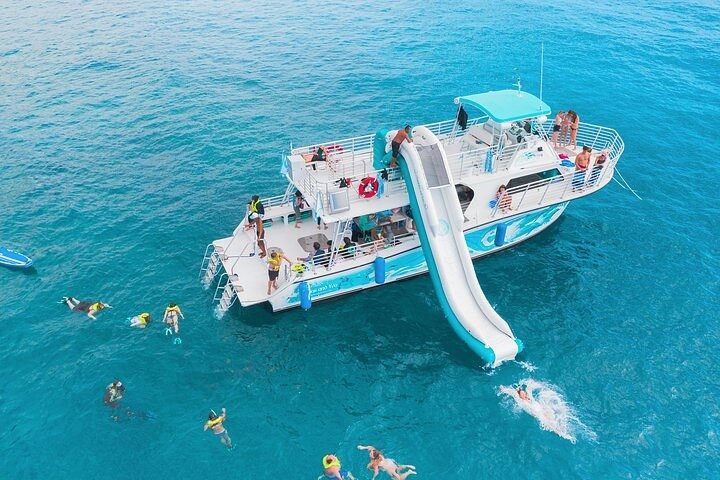
Waikiki 2-Hour Sunset Sailing Catamaran – Swim & Sail Adventure
There’s no better place to take a dip than the crystal-clear waters of Waikiki—and no better way to experience a...

Waikiki: 2 hours - Friday Night Fireworks Catamaran Cruise
Enjoy the spectacular FRIDAY NIGHT FIREWORKS show along the beautiful coastline of Waikiki while we get up close and...
Normalize Voice And Music
Often the difference between a “nice clip” and a clip you’ll actually rewatch is simple audio balance, your voice stays steady while the music sits underneath like sea spray, not a wave. When you’re recording in the air, make sure your phone is secured with safety tethers or straps so you can focus on clean audio instead of gripping your device.
In iMovie or CapCut, tap your clip, open Audio, then Normalize or Loudness. Aim for peaks around -6 dB so shouts on takeoff don’t crackle.
For dialogue clarity, drop your music to 15–25 percent, then add dynamic ducking so it sinks when you speak and rises during those quiet glides. Monitor with cheap wired earbuds and keep a foam windscreen in your daypack.
Skip blasting tracks on the boat. If you booked a Viator parasail with hotel pickup, edit during the ride back. It’s calmer, and you’ll hear gulls and grins too.
Pick Music That Matches Parasailing Energy
Kick things off by choosing a track that feels like the moment you step off the boat and the harness goes tight. Go for an upbeat tempo that mirrors the slap of wake and your first lift into clean sea air. Look for dynamic contrast: calm verses for the slow climb, brighter hooks for the wide, sunlit glide. Keep it simple on iPhone by grabbing royalty free tracks from your editor’s library, or budget $10 for a one month subscription if you want fresh options. Skip songs with heavy lyrics, they fight the wind and chatter you recorded. Before you commit, test the track under these moments:
Pick an upbeat, mostly instrumental track with contrast, calm for climb, bright for glide, then test it across key moments.
- Dock prep and straps
- Takeoff and spray
- High, quiet float
- Landing and cheers
That way, your soundtrack actually follows the honest, beat‑by‑beat feeling of soaring above the sea instead of just sitting in the background.
Sync Cuts + Speed Ramps to the Beat
Once your song’s locked in, let the beat start calling your edits so the whole ride feels sharp and weightless. In CapCut or iMovie, do simple tempo mapping by tapping markers on kicks and claps, then use beat slicing to cut canopy lifts and sea-spray turns on those hits. Add a speed ramp: slow to 50% as the boat pulls you up, then snap to 200% on the drop, so the wind looks fierce, not wobbly. Skip long taxi shots, nobody’s here for the queue. Bring headphones, 10 minutes, and about $0 if you edit free; spend $5 only for a ramp tool. You can also layer in quick, high-angle shots from creative parasailing reels to inspire your pacing and transition choices while you edit.
| Moment | Beat cue | Action |
|---|---|---|
| Takeoff | first drop | cut tight |
| Glide | offbeat | 80% slow |
| Spin | snare | 200% ramp |
| Splash | crash | hold 1s |
Export Settings for TikTok, Reels, YouTube (iPhone)
After you’ve nailed the cuts, export settings decide whether your parasailing clip looks crisp like sun on water or mushy in the feed. On iPhone, export once per platform, then upload on stable Wi‑Fi, not on a windy pier at peak crowds. Knowing you’ll spend only about 8–12 minutes in the air makes it easier to plan short, punchy edits that capture the best parts of the flight.
- TikTok and Reels: 9:16, 1080×1920, 30 fps, high quality toggle on, keep vertical portraits centered.
- YouTube Shorts: same 9:16, but choose 60 fps if your spin shots look jittery.
- Bitrate: pick “Highest” or 15–25 Mbps, and export HDR only if the app supports it.
- Audio and text: normalize to avoid boat motor blasts, add silent captions for subway scrollers.
Bring a power bank, skip extra filters. If you booked a Viator parasail, verified reviews help, and hotel pickup saves time. Free cancellation.
Frequently Asked Questions
Do I Need a Gimbal or Action Camera for Better Parasailing Footage?
You don’t need a gimbal, but it’ll smooth shaky shots; those are key gimbal benefits. For wind, spray, and wide angles, choose an action cam, action camera comparisons favor rugged stabilization and mounts over phones often.
How Do I Safely Film While Parasailing Without Dropping My iPhone?
Use a secure hand strap and a backup phone tether clipped to your harness. Keep filming one-handed, stay seated, and avoid leaning out. Start recording before takeoff, and grip firmly during dips in choppy wind.
What Accessories Help Reduce Lens Spray, Water Spots, or Salt Damage?
Use a splash-proof phone case and a lens hood, then apply hydrophobic coatings to the camera glass. Clip on a float strap, carry microfiber wipes, and stash silica gel packs to fight salt and moisture.
Can I Edit Parasailing Videos Offline While Traveling With No Internet?
Yes, over 60% of travelers edit video without Wi‑Fi, and you’ll do it too. Download apps and footage beforehand, enable Offline editing, keep clips local, and practice Battery management with low‑power mode and a charger handy.
How Can I Back up and Organize Clips to Avoid Losing Footage?
Back up daily: copy clips to an external SSD, then enable Cloud Backup when you’ve got Wi‑Fi. For Clip Cataloging, rename files by date and spot, group into albums, and keep a quick spreadsheet log.
Conclusion
Back on solid sand, you can test a common theory: epic parasailing edits need a laptop. They don’t. You’ll cut 10 minutes on your iPhone in 25 minutes, then export 1080p on hotel Wi‑Fi. Fly early to dodge crowds and hard glare, usually $70 to $150. Bring a lens cloth and lanyard, skip heavy gimbals. If timing’s tricky, Viator tours with verified reviews, pickup, free cancellation, reserve now pay later help for smooth check-in, too.

Oahu: Full or Half Day Grand Circle Island Tour
Choose from two exciting ways to experience Oahu's top attractions, scenic beauty, and local culture.Option 1: Dole Plantation & Haleiwa Town (6.5 H...

Oahu: Grand Tour Around Island with Snorkeling
Come join on a circle island adventure led by some of Hawaii’s most knowledgeable local guides and experience brea...

Toa Luau at Waimea Valley, Oahu
Toa Luau invites you to immerse yourself in the beauty and excitement of Polynesia on Oahu’s historic North Shore!...

Oahu's North Shore: 8-Line Zipline Adventure
Experience the ultimate Oahu zipline adventure on this 3-hour guided tour across the island’s famous North Shore...